

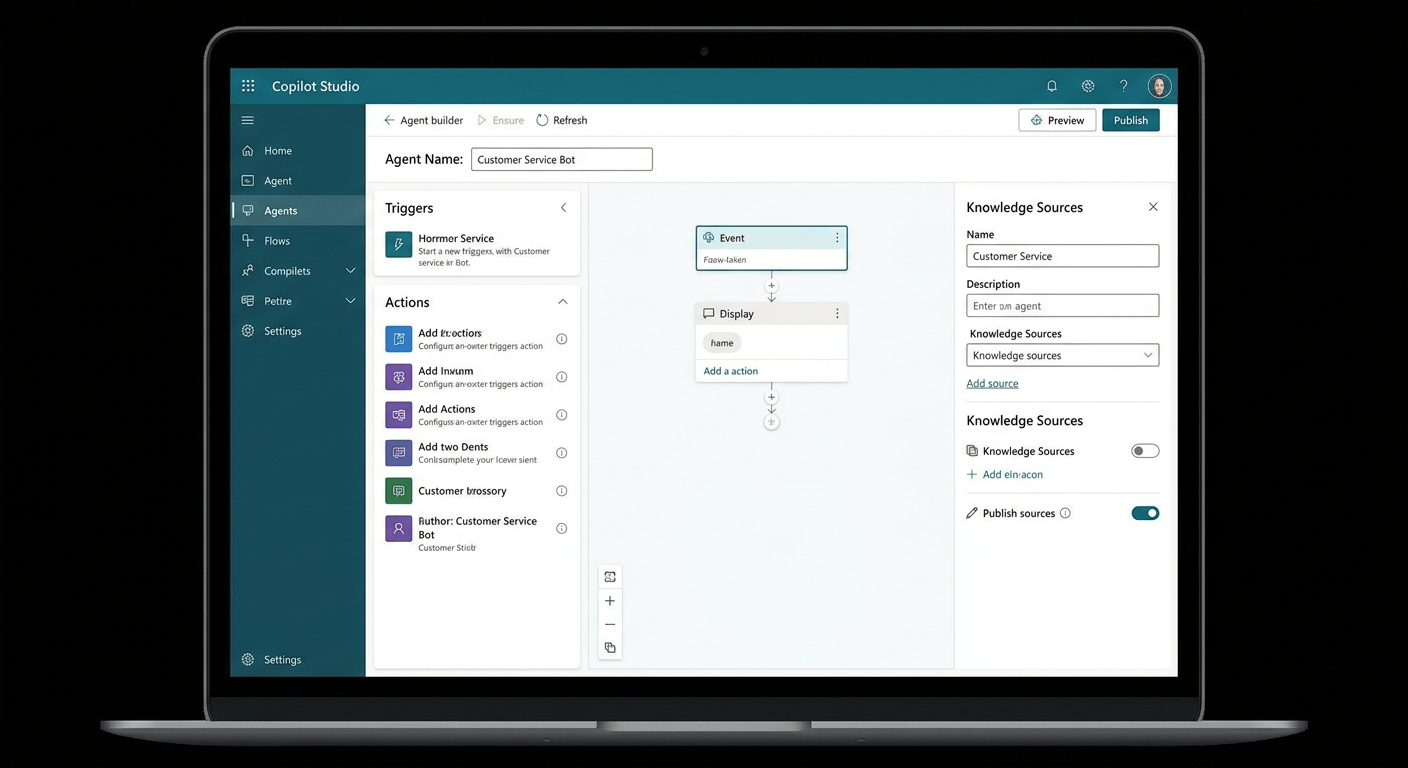
Microsoft Copilot can do a lot more than answer questions in a chat window. With Copilot agents, you can build custom AI assistants that handle specific tasks for your business, without writing a single line of code. This guide walks you through exactly how to create one, step by step.
What Is a Copilot Agent? (Plain English)
A Copilot agent is a purpose-built AI assistant that is trained on your business information and set up to handle a specific job. Think of it like a staff member who knows only one thing, but knows it extremely well.
For example, you could build an agent that answers common HR questions using your policy documents, routes IT support requests to the right team, or guides new employees through the onboarding process. The agent draws on your actual business content, not just general internet knowledge.
The key word here is agent. Unlike a simple chatbot, a Copilot agent can take actions, follow multi-step conversations, and be connected to your business data in SharePoint, Teams, or other Microsoft 365 services.
Copilot Chat vs a Copilot Agent: What Is the Difference?
Regular Copilot chat is like having a conversation with a very capable AI. You ask it something, it answers. It uses Microsoft’s general knowledge and, depending on your licence, it can access your emails and documents.
A Copilot agent is different in three important ways:
- It has a defined purpose. You tell it what topics it should handle and which ones to ignore.
- It uses your content. You connect it to specific SharePoint folders, documents, or websites so it only answers from approved sources.
- It can be shared. You deploy it to Teams, SharePoint, or a website so your whole team can use it, not just you.
Regular Copilot chat is great for individual productivity. An agent is what you build when you want consistent, reliable AI assistance across your whole business.
What You Need to Get Started
Before you build your first agent, check that your Microsoft 365 setup is ready. Here is what you need:
- Microsoft 365 licence: Business Standard, Business Premium, or any enterprise plan (E3, E5) will work. Copilot Studio is included in some plans and available as an add-on in others.
- Microsoft Copilot Studio access: This is the main tool for building agents. Your IT administrator may need to enable it for your organisation. You can access it at copilotstudio.microsoft.com.
- Content to connect: Have your source documents ready in SharePoint. The agent will use these to answer questions.
- Admin permissions: For deployment, you or your IT team will need sufficient permissions in your Microsoft 365 tenant.
If you are unsure about your current licence or setup, your IT provider can check this for you in a few minutes. Contact the Otto IT team if you would like a hand getting started.
Step-by-Step: Creating an Agent in Copilot Studio
Copilot Studio is the full-featured tool for building agents. Here is how to create your first one.
Step 1: Open Copilot Studio
Go to copilotstudio.microsoft.com and sign in with your Microsoft 365 account. You will land on the home screen, which shows any existing agents in your organisation.
Step 2: Create a New Agent
Click the “+ New agent” button in the top-right corner. A panel will slide open on the right side of the screen. You will see two options: “Describe your agent” (which uses AI to set it up from a prompt) and “Skip to configure” (which takes you straight to the settings form).
For your first agent, choose “Describe your agent”. Type a brief description of what you want it to do. For example: “An HR assistant that answers questions about our leave policies, public holidays, and onboarding process using our policy documents.”
Copilot will suggest a name, icon, and initial instructions based on your description. Review these and click “Confirm” to proceed.
Step 3: Add Your Knowledge Sources
This is the most important step. On the left-hand menu, click “Knowledge”. Then click “+ Add knowledge”.
You will see options to connect:
- SharePoint: Paste the URL of a SharePoint site or folder.
- Files: Upload Word documents, PDFs, or PowerPoint files directly.
- Websites: Add a public URL such as your FAQ page.
- Dataverse: Connect to business data if you use Dynamics 365.
Select the sources relevant to your agent, confirm access permissions, and click “Save”. The agent will index your content within a few minutes.
Step 4: Set the Agent’s Behaviour
Click “Instructions” in the left menu. Here you write plain-English rules for the agent. You can tell it things like:
- “Only answer questions about HR policies.”
- “If you do not know the answer, tell the user to contact HR at [email protected].”
- “Always respond in a professional, friendly tone.”
These instructions shape how the agent behaves in every conversation. Keep them clear and specific for best results.
Step 5: Configure Topics (Optional)
Topics are pre-defined conversation flows for common questions. Click “Topics” in the left menu. You can create a topic by clicking “+ New topic” and using the conversation designer to map out questions and responses.
For most business use cases, you may not need custom topics at all. The AI’s knowledge-based answering often handles common questions without needing to manually script each one.
Step-by-Step: Creating an Agent Directly in Teams or SharePoint
If you just want a quick agent for your team without going through Copilot Studio, you can create one directly from Teams or SharePoint. This approach is faster but offers fewer customisation options.
Creating an Agent in Microsoft Teams
- Open Microsoft Teams and navigate to the channel or chat where you want the agent to live.
- Click the “+” button at the top of the channel to add a tab.
- Search for “Copilot” in the app search bar and select it.
- Click “Add” and then choose “Create an agent”.
- Follow the setup wizard to name the agent, add a description, and connect a SharePoint source.
- Click “Create”. The agent will appear as a tab in your channel within moments.
Creating an Agent in SharePoint
- Open your SharePoint site and navigate to the document library you want the agent to use.
- In the top right corner of the document library, click the Copilot icon (it looks like a small sparkle or robot face).
- Click “Set up Copilot for this library”.
- Give the agent a name and confirm which documents it should use.
- Click “Done”. Team members visiting that library will now see the agent in the Copilot panel on the right.
Both methods are great starting points. For more control over behaviour, knowledge sources, and deployment options, use Copilot Studio instead.
Real Examples: Useful Agents for Australian Businesses
Here are three practical agents that professional services firms across Australia are already using.
HR FAQ Bot
Connect the agent to your HR policy documents in SharePoint, including leave entitlements, flexible work policies, and the Fair Work Information Statement. Staff can ask questions like “How many days of personal leave do I get?” or “What is the process for applying for parental leave?” and receive accurate, consistent answers instantly. This reduces repetitive questions to the HR team and ensures everyone gets the same information.
IT Helpdesk Bot
Build an agent that guides staff through common IT issues: resetting passwords, connecting to the VPN, troubleshooting printing, or logging a support ticket. Connect it to your IT knowledge base documents and set it up in Teams so staff can access help without waiting on hold. For complex issues it cannot resolve, configure it to hand off to your IT provider. If you are looking at broader IT support, Otto IT offers managed IT services that can integrate with this kind of agent.
Onboarding Assistant
Give new starters a dedicated agent that walks them through their first week. Connect it to onboarding guides, system access instructions, company policies, and team introductions. New employees can ask questions at any time of day without feeling like they are bothering anyone. This is especially useful for businesses with remote or hybrid staff across multiple locations.
What Agents Can and Cannot Do (Be Honest Here)
Copilot agents are impressive, but they are not magic. Here is a clear-eyed view of where they work well and where they fall short.
What agents do well:
- Answering questions based on documents you provide
- Handling high volumes of repetitive queries
- Providing consistent answers across the business
- Being available 24 hours a day, 7 days a week
- Summarising long documents quickly
What agents cannot do (yet):
- Answer accurately if your source documents are outdated or incomplete
- Handle complex emotional situations that need a human touch
- Make decisions that require judgement, context, or accountability
- Replace specialist advice (legal, financial, medical)
- Guarantee 100% accuracy, especially on nuanced or ambiguous questions
The quality of your agent depends almost entirely on the quality of your source content. Garbage in, garbage out. Before you build, review your documents and make sure they are accurate and up to date.
There is also a data security consideration. Your agent will only ever access the content you connect it to, but you should make sure that content is appropriately scoped. Do not connect an agent to sensitive HR or financial data unless you have confirmed the right access controls are in place. For advice on data governance and security within Microsoft 365, see our managed cybersecurity services.
How to Test Your Agent Before Going Live
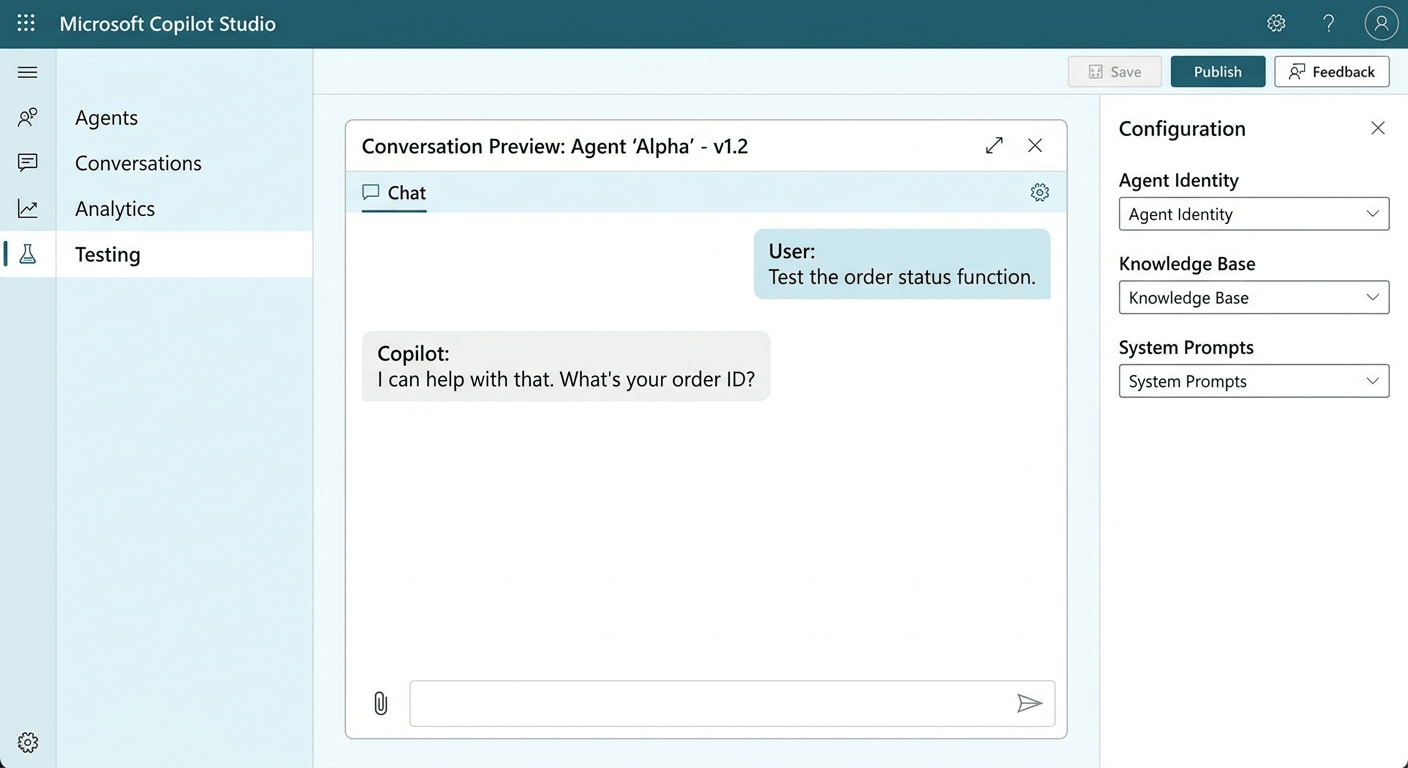
Before you deploy your agent to the whole team, test it thoroughly. Copilot Studio includes a built-in test panel that simulates real conversations.
- In Copilot Studio, click the “Test your agent” button in the top right. A chat window will open on the right side of the screen.
- Type questions that real users would ask. Start with the easy ones, then try edge cases and questions the agent should not answer.
- Review each response. Click the thumbs-up or thumbs-down icons to flag good and bad answers.
- If an answer is wrong or missing, go back to your knowledge sources and update the relevant document. Then refresh the agent and test again.
- Repeat until you are confident the agent handles the most common scenarios accurately.
Plan to spend at least an hour on testing before deployment. Getting 10 real colleagues to test it informally before the full rollout will surface issues you would never think to test yourself.
How to Deploy Your Agent
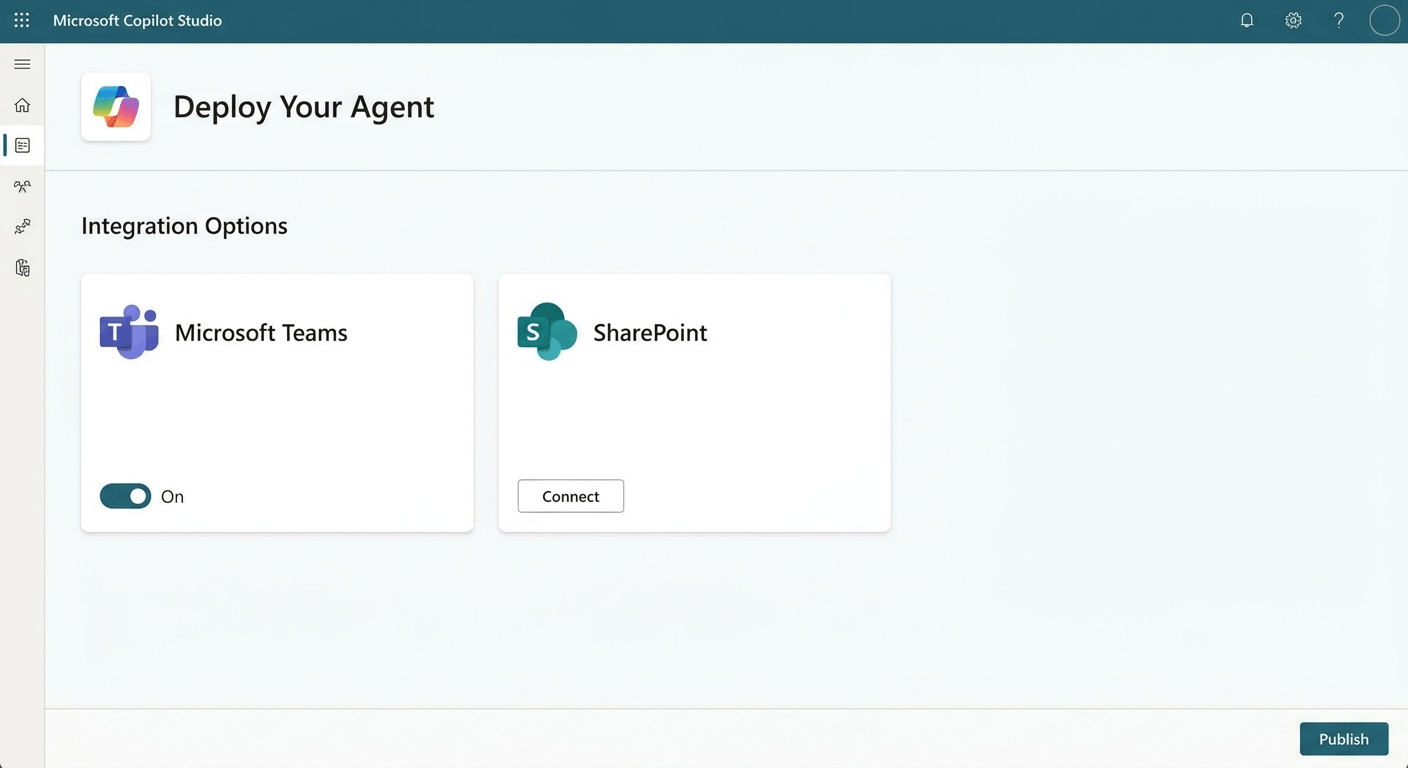
Once you are happy with how your agent performs, it is time to deploy it.
- In Copilot Studio, click “Channels” in the left menu.
- You will see deployment options including Microsoft Teams, SharePoint, Websites, and more.
- Click “Teams” to deploy to your organisation’s Teams environment. Click “Submit for admin approval” if required, or “Publish” if you have admin rights.
- For SharePoint, click the SharePoint option and follow the prompts to connect it to a specific site.
- For a website embed, select “Custom website” and copy the embed code to paste into your site’s HTML.
Once published, your agent will appear in Teams or SharePoint for the users you have given access to. You can control who sees it through standard Microsoft 365 security groups.
Ready to Build Your First Agent?
Copilot agents are one of the most practical uses of AI for Australian businesses right now. They reduce repetitive work, give your team instant access to consistent information, and can be built without any technical expertise.
The best way to start is small. Pick one problem, build one agent, test it properly, and deploy it to a small group first. Learn from that before you scale.
If you would like help planning your first agent, reviewing your Microsoft 365 licence, or making sure your data is properly secured before you start, book a call with the Otto IT team. We work with professional services firms across Australia and can help you get this right from the start.
Frequently Asked Questions
Do I need a special Microsoft licence to create Copilot agents?
You need a Microsoft 365 licence that includes Copilot Studio access. This is included in some Microsoft 365 Copilot plans and available as an add-on for others. Your IT provider can confirm your current entitlements in minutes.
How long does it take to build a Copilot agent?
A basic agent connected to existing SharePoint documents can be set up in under an hour. A more sophisticated agent with custom topics, multiple knowledge sources, and a tested deployment will take a day or two of effort spread across setup, testing, and refinement.
Can my Copilot agent access data outside Microsoft 365?
Yes, with the right connectors. Copilot Studio supports connections to many third-party services through Power Platform connectors. However, this adds complexity and may require IT involvement to configure securely.
Is my business data safe inside a Copilot agent?
Microsoft Copilot agents use the same security and compliance controls as the rest of Microsoft 365. Data stays within your tenant and is not used to train Microsoft’s AI models. That said, you should apply sensible access controls to ensure the agent can only access appropriate content. For a full review of your Microsoft 365 security posture, speak to our cybersecurity team.
What happens if the agent gives a wrong answer?
This is why testing matters. If an agent gives incorrect information, it is usually because the source document is incomplete, ambiguous, or outdated. Review the source content, update it, and re-test. You can also set the agent’s instructions to recommend users verify critical information with a human before acting on it.
Can I update the agent after it is deployed?
Yes. You can update knowledge sources, instructions, and topics at any time in Copilot Studio. Changes take effect after you click “Publish” again. Users will not notice any downtime during updates.
Do I need coding skills to build a Copilot agent?
No. The basic agent builder in Copilot Studio is entirely no-code. Advanced features like custom connectors or complex conversation flows may require some Power Automate knowledge, but for most business use cases, no technical skills are needed.
managed it support articles
Related Blog Articles
Discover more insights to optimise your business with the latest IT trends and best practices. Stay ahead of the curve by learning how to leverage cutting-edge technology for success. Explore expert advice and valuable guidance to navigate the evolving world of IT solutions