If you want a full local backup of your iPhone to your Windows PC, you have two solid options in 2026. On Windows 11, Apple now offers the Apple Devices app from the Microsoft Store, which handles backups cleanly without the bloat of older iTunes versions. On Windows 10, iTunes remains the go-to method. Both approaches give you a complete local backup you can restore from at any time.
This guide covers both methods so you can follow the steps that match your setup.
Before You Start
Regardless of which method you use, run through this quick checklist first.
- Your PC has enough free storage to hold the backup. Check your iPhone storage at Settings > General > iPhone Storage for a rough estimate.
- You have a compatible Lightning or USB-C cable to connect your iPhone to your PC.
- Your iPhone is running the latest version of iOS. Update via Settings > General > Software Update.
What a Computer Backup Includes and Excludes
A computer backup saves almost all your device data and settings. It does not include:
- Content purchased from the iTunes Store or App Store (this re-downloads automatically after restore)
- Content synced from Finder or iTunes, such as imported MP3s or ripped CDs
- Data already stored in iCloud, including iCloud Photos, iMessages, and SMS messages
- Face ID or Touch ID settings
- Apple Pay information and settings
- Apple Mail data
- Activity, Health and Keychain data (only included in an encrypted backup)

Method 1: Windows 11 — Back Up Using the Apple Devices App
Apple released the Apple Devices app for Windows 11 via the Microsoft Store. It replaces the older iTunes interface for device management and backup and is the recommended method for Windows 11 users in 2026.
Step 1: Install the Apple Devices App
Open the Microsoft Store on your Windows 11 PC. Search for Apple Devices and install it. You may also be prompted to install supporting components such as Apple Mobile Device Support.
Step 2: Connect Your iPhone
Plug your iPhone into your PC using your cable. Unlock your iPhone and tap Trust when prompted to trust the computer. Enter your iPhone passcode to confirm.
Step 3: Open Apple Devices and Locate Your iPhone
Launch the Apple Devices app. Your iPhone should appear in the left-hand sidebar after a few seconds. Click on it to open the device summary screen.
Step 4: Choose Your Backup Settings
Under the Backups section, select This Computer. For a full backup including Health, Activity and Keychain data, tick Encrypt local backup and set a strong password. Store that password somewhere safe because you will need it to restore.
Step 5: Run the Backup
Click Back Up Now. Enter your iPhone passcode if prompted. The backup progress bar will appear at the top of the app. When complete, the date and time of the last successful backup will display on the summary screen.
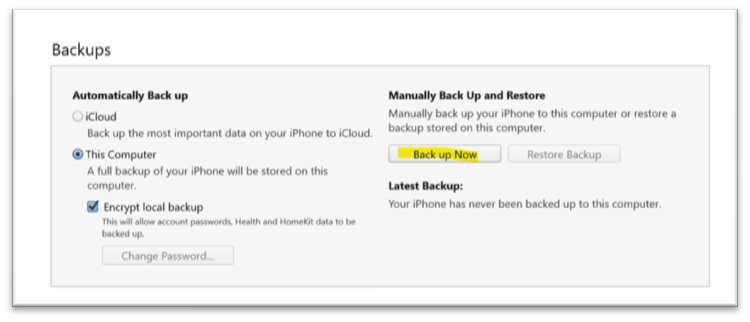
Method 2: Windows 10 — Back Up Using iTunes
iTunes remains the standard backup tool on Windows 10. If you do not have it installed, download it from support.apple.com/downloads/itunes.
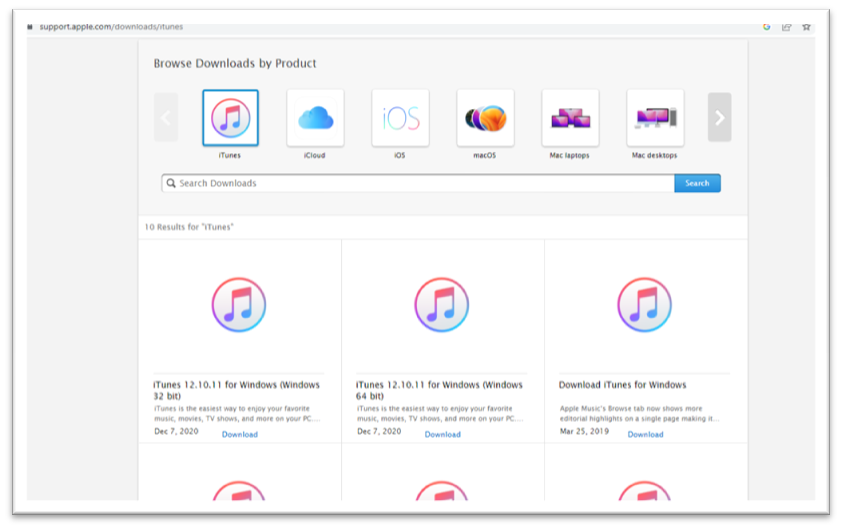
- Download and install iTunes on your PC from the Apple Support page.
- Launch iTunes once installation is complete.
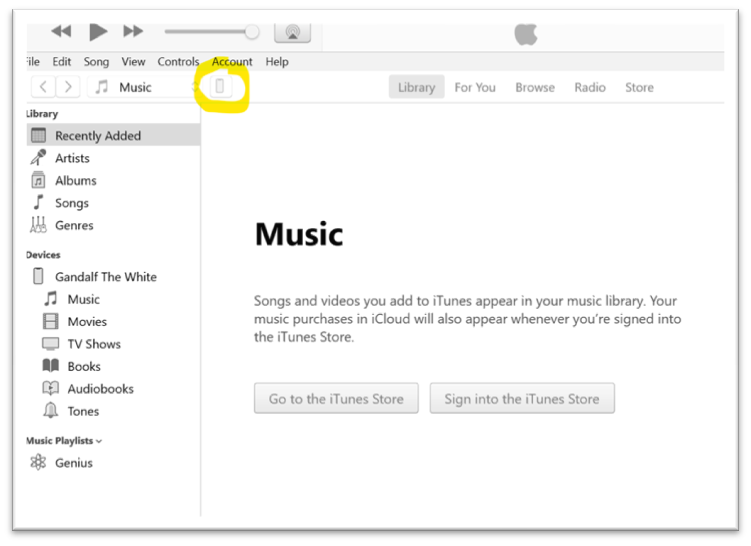
- Plug your iPhone into your PC using a compatible cable.
- Allow iTunes to detect your iPhone, then click the phone icon that appears near the top left of the iTunes window.
- Under Backups, select This Computer. Tick Encrypt local backup if you want Health and Keychain data included. You will be prompted to set a password — keep a record of it.
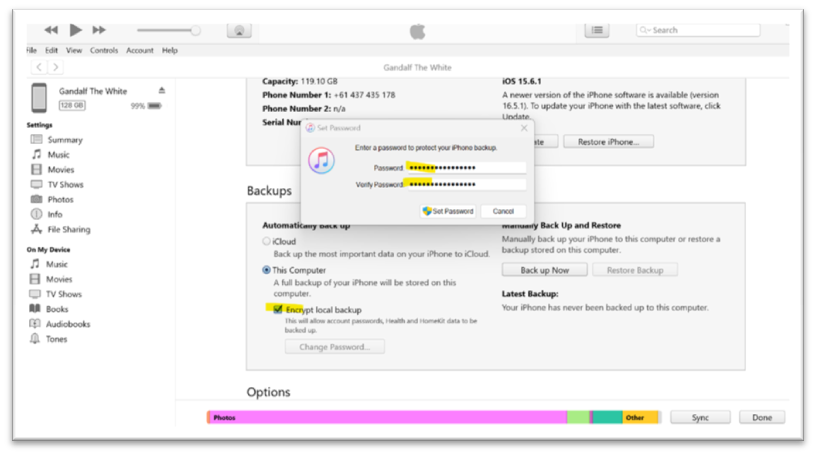
- Click Back Up Now and enter your iPhone passcode when prompted on the device.
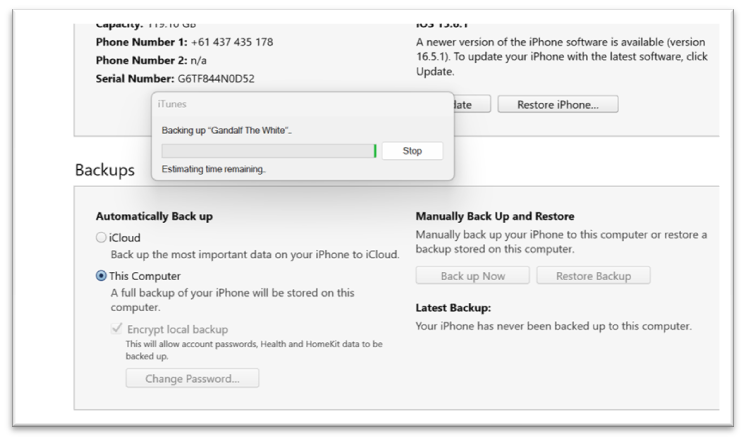
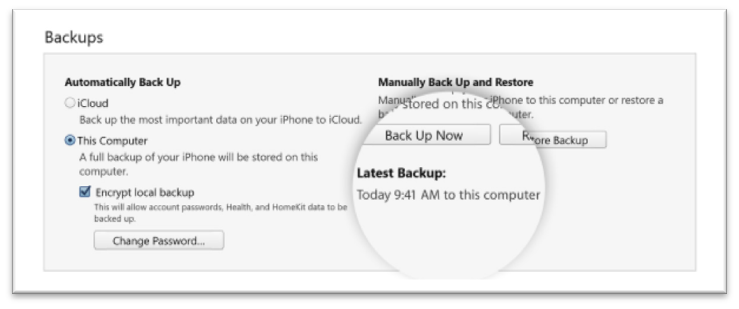
- When the backup completes, iTunes displays the date and time of the last backup in the Backups section.
Tips for 2026
- Keep iOS up to date. iOS 18 and later versions have refined backup compatibility with both the Apple Devices app and iTunes. Always update before a major backup.
- Encrypted backups are worth it. Unencrypted backups leave Health and Keychain data out. The extra step of setting a password is small compared to what you gain.
- Store backups on a drive with space to spare. iPhone storage capacities have grown significantly. Make sure your PC or an external drive has room for multiple backup versions.
- Check your backup worked. In Apple Devices or iTunes, confirm the last backup timestamp matches your most recent session.
Need Help Protecting Your Business Devices?
If your team relies on iPhones for work, a solid backup strategy is part of good IT hygiene. Otto IT helps professional services firms across Australia manage devices, data protection and cloud backups. Get in touch to talk through your options.
managed it support articles
Related Blog Articles
Discover more insights to optimise your business with the latest IT trends and best practices. Stay ahead of the curve by learning how to leverage cutting-edge technology for success. Explore expert advice and valuable guidance to navigate the evolving world of IT solutions